Tables are used whenever you have tabular data to display. If it’s something you would put into a spreadsheet, then you’ll want to put it into a table. If you would use a text document instead, then put it in a list or paragraph format.
Creating a Table
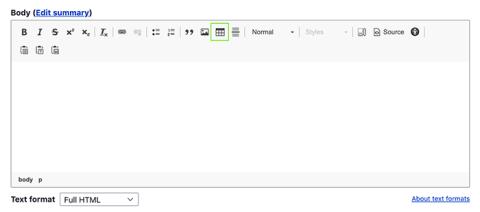
To begin, click on the table icon in the WYSIWYG editor.
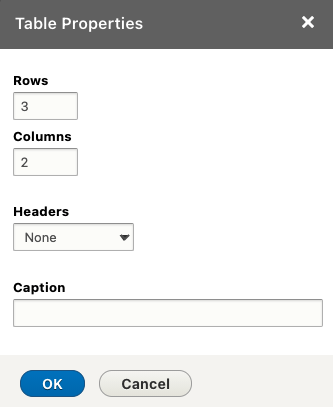
A Table Properties dialogue box will appear. This is where you can select how many columns and rows you want in your table.
Input the following fields (please note, you will be able to change these values at any time):
- Rows: Enter the number of horizontal rows you will need.
- Columns: Enter the number of vertical columns you will need.
- Headers: If the first row of the table will be used as headings, select the First Row. By selecting this option, the first row of the table will apply the proper background and border.
- Caption: The caption for a table is a table identifier and acts like a title or heading for the table.
To adjust these values after you have created a table place your cursor in any cell, right-click and select Table Properties.
Adding, Deleting Rows & Columns
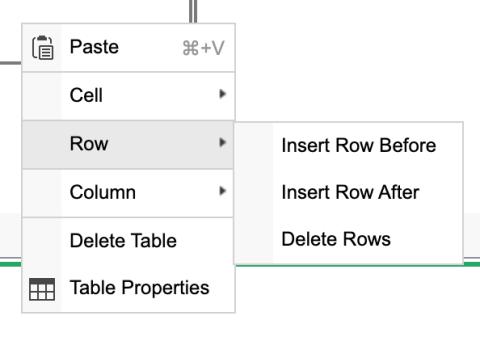
You may add a row or column either before or after any pre-existing row or column.
- With your cursor in a cell either before or after the new row, right-click > Row > and select either Insert Row Before or Insert Row After. The process for columns is the same.
- You can also delete rows and columns in this manner by placing your cursor on one of the cells within the row or column and right-clicking > hover over Cell or Row > Delete Cells or Delete Row.
Note: You can add new rows to the bottom of the table by simply placing your cursor in the bottom-right cell and pressing tab. This is helpful when making large tables with lots of content to input.
Adjusting Cell Properties
- If you need to adjust the properties of an individual cell place your cursor in the cell, right-click and hover over Cell, then select Cell Properties.
- A Cell Properties dialogue box will appear. Within this dialogue box, you can adjust whether the cell is a header, or contains data.
Merging Cells & Rows
- If merging cells within a single row (going across), highlight the desired cells, right-click in the last cell and select Cell > Merge Cells.
- If merging cells within multiple rows, right-click within the top cell, select Cell > Merge Down.
Note: When right-clicking within a cell and hovering over Cell, you have a multitude of options for merging cells down, right, or even splitting a cell in half vertically or horizontally. Doing this will only merge a single cell, thus if wanting to merge several cells within multiple rows, you will need to repeat this step.
Important Notes
- For mobile considerations, keep the content in each column brief and concise. Don’t use an excessive amount of columns.
- Don’t include long URL links in table cells. If you are required to use links in cells, link a phrase (i.e. Download) or use a shorter version of the URL (ie www.website.com instead of http://www.website.com).
- The use of merging, inserting, or splitting cells can become a complicated process. If you need to add more data to your table, use the insert row or column, much like a spreadsheet.
- Tables will automatically apply the necessary borders and background colours. It is recommended not to add your own colours in order to keep a consistent look throughout the website.
- Tables should not be used purely as a means to layout document content as this may present problems when rendering.